Saturday 24 December 2011

Florenta Almond Thins - Easy CNY Cookies

You know sometimes during Chinese New Year, some relatives will bug you for HOMEMADE cookies? Worst still, these relatives are those people who doesn't know how to appreciate the hard work we dump in from frying the pineapples to tapioca flour?
If you wanna know, yes, I do have some of these relatives. 

I don't know since when did this product emerge in the baking supplies shelves but since I started baking, I've seen the owner advertising it. When a friend first told me how nice and easy it is, I didn't believe her.. It was till I saw a discussion group in facebook discussing this again and again and again....

Its called ... FLORENTA! aka FLORENTINE or a subtitute called Bienetta.

Source: Google Images
The texture are like white fine breadcrumbs and the instructions are simple.


Just take whatever nuts you love like almond flakes, sunflower seeds, pine nuts etc etc and pour them on to a NON STICK parchment paper. Next, simply sprinkle on the florenta powder onto the nuts and BAKE!

Sprinkle it on, like the picture above. 

The first time, I tried using 180c and the sugar caramelised way too fast before I could look, about 8 minutes its in the shade of dark dark brown already. It also tasted a bit bitter.

The second time, I reduce my temperature to 150c and it took about 12 minutes for it to be done perfectly.
Make sure you are around the oven to peek every few minutes. Sugar turns brown really, really fast.


Also, if you want to cut it into even pieces, make sure you cut it with a sharp knife when its still hot, not when its cool..

Lastly, I wish all readers a very Happy Holidays, Merry Christmas and Happy New Year!!!

Tuesday 6 December 2011

First Birthday Prayers aka 抓周 (Part 2): Pandan Layer Cake

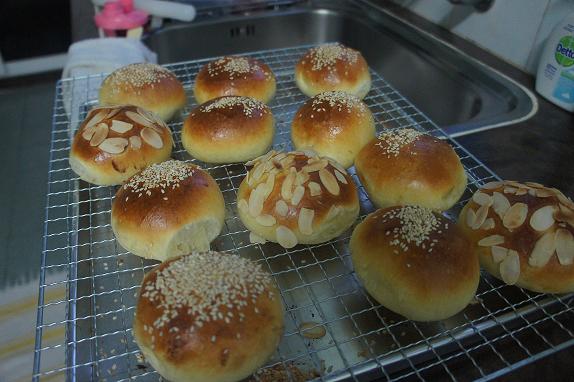
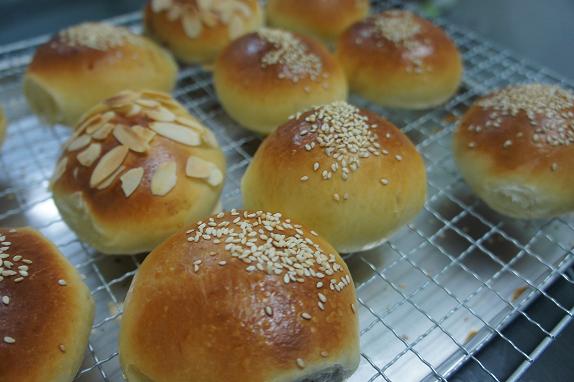
This are the food we prepared for prayers.

Glutinous Rice with chicken and mushrooms. 
One bowl of Mee Sua with 2 hard boiled eggs, 1 large chicken whole leg and 2 prawns. 
Roasted Pork
Red eggs
Angku Kuih
Hutt Kuih
Dried Beancurd aka Tau kua
Pandan Layer Cake 
Red velvet cupcakes with cream cheese frosting

After prayers, there are a few ceremony to be done.

First, Samantha have to wear a new pair of shoes bought by my mom. She then have to step on a pair of angku kuih. My mother in law said this signifies "脚踏实地".

Then, we sat her down on a table and let her determine her own future.These are the items I compiled.

From top: A stamp, a pen, a stethoscope, cash, Gold, Hand Whisk, Lipstick, Law Book and Abacus.
 What did she choose? She kept pointing at the abacus and did not lift it up. Then we waited and waited, maybe she was overwhelmed by the new toys she have.
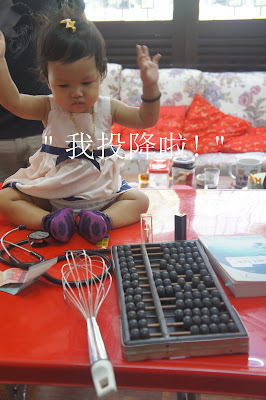
"I give up!"
In the end, daddy offer her the items one by one and the cash money interest her the most. She prefers the RM 50 note compare to the RM 10 note. LOL....

The last ceremony was the eating part. We have to feed her mee sua, chicken and egg. Being the 'tam-chiak' person, she refuse to open her mouth and take in the food. Don't know what's with her that day.

Here is the recipe for the Pandan Layer Cake I made for her.


Pandan Layer Cake
(Sponge adapted from: Table for 2... or more from Wendy)
(Pandan Layer adapted from a facebook friend. )

For the sponge: (7 inch)
250gm Whole Eggs (about 4 large or 5 medium)
130gm Castor Sugar (I reduced it too about 80gm)
100gm Cake Flour
1/2 tsp Baking Powder
50gm Coconut Milk (I used Coconut Cream)
80gm Corn Oil
1/2 tsp Pandan Paste
Some green colouring (Which I ommited)

1. Preheat oven to 180c.
2. Beat eggs and sugar till pale, thick and creamy aka ribbon stage. (I read from a taiwanese blog that sugar have to be added in right before beating as letting the sugar sit too long with the eggs may prevent it to incorporate air. )
3. Combine coconut milk, corn oil, pandan paste and food colouring in another bowl.
4. Sieve in cake flour and baking powder and fold till incorporated.
5. Add in 3 tbsp of the beaten yolks into the flour mixture and fold. Repeat this three times.
6. Pour the flour mixture into the remaining yolks and fold till even. Becareful not to deflate the yolks too much.
7. Bake in a preheated oven at 180c for about 30 minutes.
8. When cake is done, remove from mould immediately and cool on a wire rack.
9. When cake is cool completely, slice into 3 even layers.

For the Pandan Layer: (8inch)

[A]
300gm Thick Coconut Milk
400gm Pandan Juice (Blend 10 blades of  pandan leaves with some water. Sieve and squeeze it. Mix enough water to yield 700gm of liquid. Divide into 2 portions for [A] and [B].)
90gm Castor Sugar
8gm Agar-agar Powder

[B]
300gm Pandan Juice
100gm Hoen Kwe Flour

1. Dissolves 8gm of agar powder in 400ml of pandan juice. Mix everything together in a pot.
2.  Cook [A] using medium heat till mixture boils.
3. Dissolves hoen kwe flour in 300ml of pandan juice. Slowly pour into mixture [A] while stirring continuously.
4. Cook till mixture thickens and start boiling.
5. Immerse the pot in a large basin fill with hot water to prevent it from setting quickly.

To assemble: 
1. Scoop one ladle of pandan layer into a 8 inch baking tin.
2. Put in a layer of sponge cake.
3. Put in another layer of pandan layer, minding the sides first then the top. Smooth it out.
4. Put another layer of sponge then another layer of pandan layer.
5. Lastly, pour the remaining pandan layer in and smooth in out properly. This last layer will be the bottom of the cake when you un-mould it.
6. Chill in the refrigerator for at least an hour before un-moulding and serve.

Notes:
(i) Before assembling, spray the 8 inch tin with some water. This will ensure easy removal of the cake.
(ii) Use a sharp knife and run across the sides. The cake will un-mould easily like a jelly.
(iii) Prepare everything ahead of time including tools you need and ingredients.


Wednesday 23 November 2011

10 Minutes Rice Flour Butter Cake


I came across this recipe at 2.30am midnight this morning. Hands so itchy and keep on calculating the time it will take me to finish this cake. 3.30am, I think. Wanted to start on it immediately but I was afraid hubby will wakes up and find me missing from the bedroom again. Sure show me black face... Sigh... In the end, I did this first thing in the morning when I walk into my kitchen. BEFORE my breakfast and coffee. I finished weighing, mixing and putting it into the oven in 10 minutes. 

Initially, I was a bit afraid that gluten will form if I beat the plain flour for 3 minutes. But I was wrong.. I timed the mixing using a timer and scrape the mixing bowl every 1 minute.

The texture is very fine. Almost like a normal butter pound cake using the creaming of butter and sugar method. The cake did not rise much and suprisingly, its quite yummy. Will surely do this again if I am craving for a nice slice of butter cake to go with my Chatime. 


Rice Flour Butter Cake
**Makes a 7 inch square tin

120gm Plain Flour ( 中筋面粉)
40gm Rice Flour (粘米粉)
1 tsp Baking Powder
120gm Unsalted Butter (Room temperature, cut into small cubes)
2 Whole eggs 
90gm Castor Sugar
40gm Milk

Method: 
1. Combine and sieve plain flour, rice flour and baking powder together. 
2. Add everything into the mixing bowl and mix under low speed till wet and dry ingredients incorporated. 
3. Mix under medium speed for 3 minutes, scraping the sides of the bowl every one minute. 
4. Pour batter into a 7 inch square tin and smooth out the top.
5. Bake in a preheated oven at 170c for about 30 minutes or until inserted skewer comes out clean. 
6. Turn off the oven and leave the cake to gradually cool for 10 minutes then take it out to cool completely. 


Tuesday 22 November 2011

Aspring Bakers #13 : Tiramisu Cupcakes with Cheesie Mascarpone Swirls

Long time no see.

I injured my right shoulder 2 weeks ago and was ordered to rest and not move my arm too much. Even basic walking and shopping for groceries would make me tear because of the pain. Yes, its that bad.
I can't help it and went for a basket weave cake piping class and further worsen the situation. I can't even drive properly home after that class. Started on oral medication and its not improving. Then I tried a medicated anti-inflammatory patch and thank god, the pain subside. Its still there but I feel its getting better.


I used Starbucks VIA ready brew coffee these cupcakes and its so fragrant. It really smell and taste like an authentic tiramisu. For those who are curious, VIA ready brew is a new product from Starbucks and its instant coffee! Just tear open the small packet, pour it out, add hot water and there.. instant Starbucks Italian Roast brew coffee. Convenience comes with a price though. Its a bit pricey for the heavy coffee drinkers like hubby. 12 sachets of VIA cost about RM 28. Even after employee discount, its still expensive la..


Do try this recipe out. Its convenient when you are craving for a pick-me-up..


I will be submitting this recipe to Aspiring Bakers #13 - Enjoy Cupcakes! hosted by Min's blog.


Starbucks VIA Tiramisu Cupcakes with Cheesie Mascarpone Swirls 

(Adapted with minor changes from: Dailydelicious)
**Makes about 10 cupcakes

Ingredients:
2 Egg yolks
50gm Castor Sugar
1 Sachet Starbucks VIA Italian Roast
60ml Hot Water
2 Tbsp Kahlua

100gm Cake Flour
1 tsp Baking Powder
1/2 tsp Salt


2 Egg whites
80gm Castor Sugar

Method: 
1. Sieve Cake flour, baking powder and salt together. Dissolve Starbucks VIA coffee powder into 60ml of hot water.
2. Using a hand whisk, whisk egg yolks and sugar together till sugar dissolve. Whisk in 60ml of the instant coffee and 2 tbsp of kahlua.
3. Add in the sifted cake flour and fold gently incorporated.
4. Using an electric mixer, whisk egg whites on low speed till foamy then add in castor sugar gradually. Switch to high speed till soft peaks form.
5. Fold the whites into the yolks mixture in 3 parts.
6. Scoop the cake batter into lined muffin pans till 2/3 full.
7. Bake in a preheated oven for 160c for about 15 minutes.
8. Cool completely before icing.


For the Mascarpone Cheese Icing, 

250gm Mascarpone Cheese
2 Tbsp Castor Sugar
1 Tbsp Kahlua

Cream the mascarpone cheese with castor sugar till smooth then add in the kahlua and mix well. If icing is too runny, chill in the refrigerator before use.

Tuesday 1 November 2011

Easy and Yummy Peanut Butter Butter Cookies

Melt in your mouth, NOT in your hands.. The famous M&Ms tagline best describe the texture of this cookies...
The original recipe said  "确定、一定以及肯定好吃".

CNY is coming and I would need to polish my skill up a bit to offer some "homemade" cookies for guest. I never like baking cookies as there's no one to finish it up and they always end up in the dustbin after sitting on the counter for a month.

Since I am known to my family for my passion for baking, I decided to at least bake one type of cookies if people were to ask whether I made any from the dozens of red-cap-container around...

While browsing a chinese blog, I came across this recipe. It sounds pretty easy and straight forward. Might as well give it a try since I am also baking some mini buns. The oven is preheated already so go ahead la...

This is a perfect substitute for the classic peanut cookies as it doesn't require much work. Even beginners can do it!

Give it a try, you will be surprise!

Peanut Butter Butter Cookies
(Adapted from: 『君之』的手工烘焙坊)

65gm Butter (I used unsalted SCS but next time I would try using salted butter)
50gm Icing Sugar (Its still a bit too sweet for my liking. Would reduce to 35gm next time.)
10gm Whole Eggs
35gm Peanut Butter (Chunky or smooth, your choice.)
100gm Low Protein Flour

1. Using an electric mixer, cream butter and icing sugar till its smooth and pale.
2. Add in whole eggs and mix well.
3. Add in peanut butter and continue beating till everything is incorporated.
4. Sieve in flour and mix well using a spatula.
5. Put cookie dough on cling film and roll it out to desire thickness.
6. Freeze in freezer for at least 1.5 hours for it to harden.
7. Cut into desire shape either using a knife, or a cookie cutter.
8. Arrange cookies on a baking tray (cookies will expand a bit so please make sure they have enough space) and bake in a preheated oven for 160c till brown.

p/s: You can refer to the original link above for ideas to shape the cookies.

Sunday 16 October 2011

Aspiring Bakers #12: Kuih Lapis 九层糕 v2.0

I love my kueh and was very happy that this month's aspiring bakers theme is traditional kuih. Can't wait to submit a recipe but has been very busy because of a teething baby.


I initially tried out kuih talam but failed. It was too soft even to cut. Tastewise, its quite alright.


Anyway, my pandan leaves are almost botak already so I guessed I need to submit another recipe.

Stumble across this kueh lapis from a blog and tried it because it uses Hoen Kwe Flour aka Green Bean Flour. Usually the ones i saw uses tapioca starch.


I am very happy with the results as the kuih is not too soft, just perfectly chewy. I need to improve my cutting skills though.

Look at my previous attempt with a different recipe here.

I will be submitting this recipe to Aspiring Bakers #12 - Traditional Kueh hosted by Small Small Baker (SSB). 


Kuih Lapis 九层糕 v2.0
(Adapted from: Diana's Desserts)
**Make a 7" Round Tin

Ingredients: 

(A)
160gm Rice Flour
20gm Hoen Kwe Flour (White)
150ml Water
250ml thick coconut milk (squeezed from 1 grated coconut)
1/4 tsp. salt 

(B)
190g castor sugar
300ml water
2–3 screwpine leaves (pandan leaves), knotted

Some RED food Colouring

To prepare mixture:
1. Combine rice flour, hoen kwe flour and 150ml water in a mixing bowl. Let soak for 45 minutes. 
2. Boil castor sugar, 300ml water and pandan leaves together in a saucepan till you can smell the aroma of pandan leaves.
3. Add in the thick coconut milk and salt into the rice flour mixture after 45 minutes.
4. Add in the syrup as well.
5. Stir to combine. Sieve mixture. 
6. Divide mixture into 2 parts. 400ml and 500ml. 500ml will be your red and 400ml will be your white.

To steam:
- Steam the round tin in boiling water for about 4-5 minutes. Start by pouring in 100ml of RED first.
- Steam for 3 minutes.
- Alternate by continuing with white, then red, and so on.
- This is the timing I did. 
1st and 2nd layers: 3 minutes. 
3rd and 4th layers: 4 minutes. 
5th and 6th layers: 5 minutes.
7th and 8th layers: 6 minutes.
9th layer: 15 minutes. (Add in more food colouring in the last layer)
- When kuih is done steaming, remove for steamer and leave to completely cool before cutting.


Sunday 2 October 2011

Angry Birds Fondant Cupcakes + Updates

So I have been missing for about 2 weeks. What have I been doing?

I made paus. Wendy's Purple Sweet Potatoes Rose Mantous. Butternut Squash Mantous from Carol's book. No attempt on fillings though cuz I am just too lazy to handle raw meat. Also baked 2 Pandan Chiffon Cake, made another batch of Dragon Fruit Agar-agar Mooncakes for my aunts.

Next, I have been making dinner 3 times a week. That's an improvement for me because knowing me and hubby, we are those who love to eat out. But eating out has been quite stressful lately because we just run out of ideas of what to eat. Therefore, I started cooking. For the sake of hubby's body weight, and Sam's solids.

Samantha is turning ONE in December therefore I realised after that, I cannot be ignorant and must start introducing adult food for her already. Not those seasoning-filled food though but real adult food like chicken, fish etc etc... Nowadays when I cook, I will boil some chinese soup. Lotus root, watercress vege, ABC soup.. All natural with chicken or pork. Before I season with salt, I will scoop about 300ml out and reserve for Samantha's porridge stock.

So I have also been planning Samantha's First Birthday Party and I am getting quite frustrated already. (More on that in another blogpost.) I was planning to make a fondant cake for my girl but decided against it after I went to search for more info on it. I think its too hard for a beginner baker for me and I would need to do a lot of practise and its a bit too late to take up classes. I search for some fondant lessons and most of them its either too close to Sam's birthday or its not detail enough. In the end, I found this Angry Birds Fondant cupcakes lesson on the net and I enrolled myself.

Here is my creation:


I finish all 6 pcs of fondant decorations in 3 1/2 hours. The cupcakes are prepared and colours are all mixed and rolled even when I arrived. We just need to spread buttercream and start covering the cupcakes with fondant. 


This triangle-shaped-bird is my last figurine and its the one I am most happy with. 

Beside 3D figurines, I also learned 2D ones. My verdict, I somehow find that 3D is more fun to make and 2D is a bit boring after some time... 


The class covered rolled fondant and gumpaste. I also find that covering the whole cupcakes with fondant with a little excess over the edges make things easier when figurines are placed on top.

I am now considering whether to make my own fondant and play with it for a bit first before buying a whole tub of branded one and decorate my cakes and eat it.

Oh, and I did not taste the fondant nor cupcakes till now. Haha.. A bit geli after playing with it for a few hours. My maid tasted and she said its like sweets. She said its nice. Well, everything sickening sweet to her is nice.

I smelled of sugar when I am back home and my dog was so happy and jumping and sniffing around the cupcakes. Let's just hope the cupcakes are still on my kitchen table tomorrow morning.

Monday 12 September 2011

Aspiring Bakers #11: Dragon Fruit Corn Kennels Agar-agar Mooncakes 火龙果粟米燕菜月饼

I saw some red dragon fruit at the pasar malam and its selling for 4 for RM 10. Can you remember when dragon fruit just came out, how much does it cost per bijik? I couldn't.. as I was quite young. The usual imported fruits my mum buys are oranges, apples and plums. I don't think they have cherries and all the berries-berries at that time.

Nowadays, ever since I have my own home, I make sure I always have fruits lying around in my kitchen. I have tried the super expensive black cherries which cost about RM 60-70 per kg and also those really expensive peaches that cost around RM 8 per piece. There is a RM 20 apple we bought which taste like... well, APPLES!

When I was pregnant with Samantha, guess whats my biggest cravings are? WATERMELONS. Yes you heard read it right. It was kind of a forbidden fruit for pregnant women. But I took it anyway after some researching on the net. I can easily polished off half a big watermelon in a week.

This original recipe uses cream corns but I bought the wrong ones. I didn't know there are whole corn kennels in a tin too! The agar-agar tasted really nice with each bite bursting out with sweet corn kennel juice!

I will be submitting this recipe to Aspiring Bakers #11 - Mid-Autumn Treats hosted by Happy Home Baking. 

Note to self: Never take pictures of red objects with a redder background.
Not enough corn kennels.. Poor lighting...


Dragon Fruit Corn Kennels Agar-agar Mooncakes
(Makes about 6 pieces)

For the yolks: 
1 tsp Agar-agar powder
40gm Castor Sugar
1/8 tsp Salt
150ml Water
100gm Carrots

1. Chop and peel carrots into little pieces and steam for about 8 minutes or till carrots turn soft. Puree in a blender till fine.
2. Put everything else together in a pot including the puree carrot and cook till mixture boils. Turn off heat.
3. Sieve the mixture using a fine sieve. 
4. Pour mixture into egg yolks mould and let set at room temperature for about 30 minutes then chill in the refrigerator.
5. Unmould the yolks when ready to use.

Corn Fillings:
1 1/4 tsp Agar-agar Powder
40gm Sugar
100ml Thick Coconut Milk/Coconut Cream
200ml Water
1/8 tsp Salt

Sweet Corn Kennels

1. Mix everything in a pot except for the sweet corn kennels and bring mixture to boil. Turn off heat.
2. In the filling moulds, put in some corn kennels till it fill up about 1/2 full.
3. Pour in the coconut milk liquid and insert the egg yolks in the middle of the mould. 4. Let set at room temperature for about 30 minutes then chill in the refrigerator.
5. Unmould the fillings when ready to use.

For the Dragon Fruit Skin:
1 Whole Red Dragon Fruit
225ml Water

1/2 + 1/4 Tbsp Agar-agar Powder
75gm Castor Sugar
225ml Thick Coconut Milk/Coconut Cream

1. Wash the dragon fruit and slice it into half. Scoop the fruit out from the skin and mashed lightly with a fork.
2. Cook the dragon fruit in a pot with water. Best use a whisk to stir and stir to make the colour come out more intensely. When mixture boils, reduce heat and simmer for about 10 minutes under low heat. Turn off heat and sieve the mixture.
3. Now, measure the red liquid and see if there is still 225ml, if not, do add in enough water to make it 225ml.
4. Cook the agar-agar powder, sugar, coconut milk and the red liquid in a pot till it boils. Turn off heat.
5. In the mooncake moulds, pour a little of the final mixture and leave it half set.
7. Put in the sweet corn fillings in the centre of the mould.
8. Fill the moulds up with the remaining liquid.
9. Leave to set at room temperature for about 30 minutes then chill in the refrigerator before serving.

Monday 5 September 2011

Aspiring Bakers #11: Pumpkin Black Sesame Agar-agar Mooncakes 南瓜椰香黑芝麻燕菜月饼

" First thing first, I edited the recipe for the SKIN of the Cendol Gula Melaka Agar-agar Mooncakes. I forgot to take into account that I made another 1/2 portion just to fill up the moulds. I am very sorry for the inconvenience caused. "
 
I don't know whether its my problem or the recipe book but I absolutely hate recipe books that doesn't specify how much will the recipe yield. But after attempting 2 recipes from the same book, 3 actually, one sort of failed so its not recorded here, I realized its impossible to estimate the final result. This recipe below yields about 7 pcs but the previous one yields about 5 pcs only.

  
Another problem I encountered was that I always have not enough for my mooncake's skin portion and I would have to rush to make another portion to fill up the moulds so as not to make my mooncakes look like a piece of Kuih Lapis instead. Its always good to have more than not enough isn't it? 


Therefore, I adjusted accordingly and made 1 + 1/2 portion of the mooncake's skin. That explains if my recipe looks weird. 


I will be submitting this recipe to Aspiring Bakers #11 - Mid-Autumn Treats hosted by Happy Home Baking.

Pumpkin Black Sesame Agar-agar Mooncakes
(Makes about 7 pieces)


For the yolks: 
1 tsp Agar-agar powder
40gm Castor Sugar
1/8 tsp Salt
150ml Water
100gm Carrots

1. Chop and peel carrots into little pieces and steam for about 8 minutes or till carrots turn soft. Puree in a blender till fine.
2. Put everything else together in a pot including the puree carrot and cook till mixture boils. Turn off heat.
3. Sieve the mixture using a fine sieve. 
4. Pour mixture into egg yolks mould and let set at room temperature for about 30 minutes then chill in the refrigerator.
5. Unmould the yolks when ready to use.


Black Sesame Fillings:
1 tsp Agar-agar Powder
50gm Sugar
75ml Thick Coconut Milk/Coconut Cream
125ml Water

4 Tbsp Black Sesame Powder

1. Cook everything in a pot except for the black sesame powder until mixture boils.
2. Add in the Black Sesame Powder and mix well. Remove liquid from heat.
3. Pour the mixture into little round containers that fits into the mooncakes mould and put in the yolks in the centre of the mixture.
4. Let set at room temperature for about 30 minutes then chill in the refrigerator.
5. Unmould the fillings when ready to use.

For the Pumpkin Skin:
1/2 + 1/4 Tbsp Agar-agar Powder
90gm Castor Sugar
1/8 tsp Salt
150ml Thick Coconut Milk/Coconut Cream
400ml Water


150gm Pumpkins (I used butternut squash)

1. Chop and peel pumpkins into little pieces and steam for about 13 minutes or till pumpkins turn soft. Puree in a blender till fine.
2. Mix everything in a pot except for the pureed pumpkin and bring mixture to boil.
3. Scoop out 150ml of the mixture and this is the white part of the skin.
4. Add in the pumpkins into the remaining mixture and bring to a boil again. Turn off heat.
5. Sieve the pumpkin mixture with a fine sieve.
6. In the agar-agar moulds, pour a little of the pumpkin mixture and leave to set.
7. Put in the black sesame fillings in the centre of the mould and then pour some white mixture.
8. Lastly., finish with a layer of pumpkin mixture.
9. Leave to set at room temperature for about 30 minutes then chill in the refrigerator before serving.

Friday 2 September 2011

Aspiring Bakers #11: Cendol Gula Melaka Agar-agar Mooncakes 晶露椰香燕菜月饼

Before I started utilizing my kitchen, I used to order agar-agar mooncakes from a ice kacang stall. The 4 flavours of agar agar mooncakes cost RM 18 per box and I would eat and eat and finish all in one day.


I would cut them into half and just hold the piece with my bare hands and munch away... 


1 month ago, when the mooncakes phenomenon started, I went back to the stall and was shock to see that the stall had been burnt down in a fire. There are no sign or whatsoever stating where they have moved or when they are starting business again.


I got no choice but to satisfy my own cravings by making some on my own!

This are the moulds I use. For the fillings mould, it measure 4.5cm in diameter.

I will be submitting this recipe to Aspiring Bakers #11 - Mid-Autumn Treats hosted by Happy Home Baking.


Cendol Gula Melaka Agar-agar Mooncakes
(Makes about 24 yolks, 5 Fillings and 5 Skins)

For the yolks:
1 tsp Agar-agar powder
40gm Castor Sugar
1/8 tsp Salt
150ml Water
100gm Carrots

1. Chop carrots into little pieces and steam for about 8 minutes or till carrots turn soft. Puree in a blender till fine.
2. Put everything together in a pot including the puree carrot and cook till mixture boils.
3. Sieve the mixture using a fine sieve. 
4. Pour mixture into egg yolks mould and let set at room temperature for about 30 minutes then chill in the refrigerator.
5. Unmould the yolks when ready to use.

Gula Melaka Fillings:
1 tsp Agar-agar Powder
50gm Gula Melaka (Chop finely)
1/8 tsp Salt
75gm Thick Coconut Milk/Coconut Cream
150ml Water
1 blade of Pandan Leaves

1.  Cook everything in a pot till gula melaka dissolves.
2. Discard pandan leaves and sieve the mixture.
3. Pour the mixture into little round containers that fits into the mooncakes mould and put in the yolks in the centre of the mixture.
4. Let set at room temperature for about 30 minutes then chill in the refrigerator.
5. Unmould the fillings when ready to use.

**edited 5/9/2011
For the Skin:
1 Tbsp Agar-agar Powder
105gm Castor Sugar
1/8 tsp Salt
150ml Thick Coconut Milk/Coconut Cream
375ml Water

250gm Cendol (Discard the liquid)

1. Mix everything in a pot except for the cendol and bring mixture to boil.
2. In a mooncake mould, put in some cendol and then pour a little of the mixture in. (Mixture must be slightly cool and thickens to prevent cendol from sinking)
3. Wait for mixture to be half set then put in the fillings in the centre.
4. Put some cendol on top then pour the remaining mixture in till slowly till full.
5. Leave to set at room temperature for about 30 minutes then chill in the refrigerator before serving.

Monday 29 August 2011

Red Bean Buns with Homemade Red Bean Paste

Other than my love for Raisin Loaf, I love red bean buns too! Store bought red bean buns are always too sweet and tasted a bit weird. It seems like some artificial stuff are added to the red bean paste according to some old people at home.


I did not use any starter for this recipe but I guess the extra 2 tablespoons of oil added into the red bean paste act like a bread softener. Its so soft even after I leave it to cool under a strong fan for about 2 hours.


I guessed I have to practise on my shaping skills as the skin of the buns is always too thin resulting in a crispy skin if eaten hot.


Red Bean Buns with Homemade Red Bean Paste
**Make about 12 buns

For the buns:
320gm Bread Flour
3/4 tsp Yeast
1 Whole Egg
1/4 tsp Salt
160gm Milk
30gm Sugar

50gm Butter

1. In a large mixing bowl, add in everything from (A) except for the butter. Reserve 30gm of the milk to be added in later.
2. Mix under low speed till a dough is form. Add in milk slowly. Wait till all the liquid is absorb before adding in more milk.
3. Add in butter and knead till the dough is smooth, shiny and elastic. When pull apart, dough should form a very thin, almost transparent layer.
4. Leave dough to rise for 60 minutes at a warm place covered with a wet cloth till double its size.
5. Take out the dough from the bowl and put in on a floured working surface. Punch the dough to get rid of the air trapped inside.
6. Divide dough into 50gm each and roll into a round ball.
7. Wrap each dough with red bean filling(about 25gm each), shape into round balls and put it on a lined baking tray.
8. Leave dough to proof in a cold oven for about 1 hour.
9. After an hour, take the bread dough out and brush lightly with egg wash. Sprinkle some sesame seeds on top for garnishing.
10. Bake in a preheated oven at 160c for about 20 minutes.

For the Red Bean Paste:
250gm Red Bean
500ml Water
Rock Sugar
2 tbsp Corn Oil

1. Wash and drain the red beans and put it into the slow cooker.
2. Fill the slow cooker up with water and switch it on to LOW for about 6 hours.
3. Add rock sugar to taste.
4. Sieve the cooked red bean to get rid of any remaining liquid and blend into a fine paste with a blender/food processor.
5. In a frying pan/wok, heat about 2 tbsp of oil in it.
6. Add in blended red bean paste and lightly simmer and toss till desired consistency is formed.
7. Leave red bean paste to cool and it can be stored in the refrigerator for up to a week.

Monday 22 August 2011

Homemade Blueberries Jam

Look a bit sourish isn't it?
I went to pasar malam last week and saw some fresh blueberries from the fruits stall. Its only RM 10 for a pack and without further thoughts, I bought a pack. When I reach home, I started thinking what do I do with the blueberries? Its not very nice to eat just the way it is and I started googling for some blueberries recipe.

The blueberries are quite big size compare to the usual ones.
It was then I saw some method of making our own blueberries cheesecake topping or blueberries jam etc etc.

I have a Japanese Cotton Cheesecake in my fridge which I will bring to my friend's house warming party. So I decided, I would make some blueberries jam to go with the cake!
 
Blueberries Jam
2 cups of fresh Blueberries
3 Tbsp Castor Sugar
2 Tbsp Lemon Juice
1 tsp Lemon Rind
1 + 1/2 Tbsp Corn Flour
2 Tbsp Butter

1. Wash and drain blueberries and discard any fruit that is soft or spoil.
2. In a small pot, put all the ingredients in except for the butter and cook under low heat.


3. Blueberries juice will start oozing out and the colour will turn deep purple after about 5-6 minutes of cooking.


4. Transfer it into a clean container and stir in melted butter.


5. Leave to cool, cover and chill in the refridgerator before serving.


Friday 19 August 2011

65°c Cream Cheese Meat Floss Buns

I made some water roux last few days and keep planning that I wanna bake some buns again using the water roux method. I don't know if different recipes will produce different results as the previous time I bake with water roux, its not as soft as I would expect.

My raisin loaf which I did not use any starter did not fail to disappoint me. I once kept them for 6 days and ate it and its still tasted fresh and soft. Maybe my expectation for water roux is too high... If I were to bake it for my mum, friends or family, I would always go back to the raisin loaf.

So this time, I tried again. When its out from the oven, its really really soft. But I find that it has no difference compare with other dough. No doubt, the dough is so sticky that it requires so much extra flour to shape and wrap the fillings it.


Give it a try as this recipe requires cream cheese instead of the usual butter. If u have some odd amount of cream cheese sitting in your fridge, might as well use them up!


65°c Cream Cheese Meat Floss Buns (65°c 烫种奶油乳酪肉松面包)

To make Water Roux Starter:
250ml Milk
50gm Bread Flour

1. In a pot, whisk the milk and flour together till no lumps.
2. Cook under medium-low heat for until temperature reaches 65°c, stirring constantly with a whisk.
3. Remove from heat and cover with a cling firm touching the paste and let cool under room temperature.
4. Water Roux Starter can be use after it has cool down to room temperature.

Ingredients: 
80gm Water Roux Starter

200gm Bread Flour
100gm Wholemeal Flour
1/2 tsp Yeast
1 Whole Egg
70gm Cream Cheese
50gm Molasses Syrup (I substitute with the same amount of Honey)
1/8 tsp Salt
80ml Cold Water

Method: 
1. In a large mixing bowl, put everything into the bowl  and mix under low speed till a dough is form. Reserve 30ml of water to be added in later.
2. Slowly pour in the remaining water making sure that all the liquid are absorb before the next pour.
3. Knead under medium speed till the dough is smooth, shiny and elastic. When pull apart, dough should form a very thin, almost transparent layer.
4. Leave dough to rise for 60 minutes at a warm place in a large bowl covered with a wet cloth till double its size.
5. Take out the dough from the bowl and put it on a floured working surface. Punch the dough to get rid of the air trapped inside.
6. Divide dough into 12 equal parts. Roll each part into a smooth round ball. Leave to rest for 10 minutes.
7. Shape dough, wrapped in desire fillings and arrange it onto a baking tray lined with parchment paper.
8. Sprinkle some water onto the shaped dough surface and leave to proof for another 60 minutes.
9. Brush the dough lightly with egg wash and sprinkle some sesame seeds on top for garnishing.
10. Bake in a preheated oven for 15-20 minutes at 170c.
11. Leave bread to cool on a wire rack before serving.

Tuesday 9 August 2011

Super Soft Raisin Loaf

I loves my Raisin bread, Raisin Loaf, Raisin cake...No matter which bakery I go, I will always pick up their Raisin Loaf and not other bread/buns.

The raisin loaf from The Loaf Bakery is always my favourite although its a bit on the expensive side. Its RM 10 per loaf.

Since I have some raisins soaked in rum in my fridge, might as well I add in some into my Milk Loaf.

Funny this recipe doesn't require any starter at all but it yields such a soft loaf. Even the crust is soft. Just like those bought from bakery. After 24 hours under room temperature, sliced and kept in an airtight container, it still taste fresh from the oven.


Milky Raisin Loaf
(Adapted from: 烘焙新手必備的第二本書 by Carol 自在生活)
**Make a 500gm Loaf Pan 

Ingredients:
(A)
426gm Bread Flour
67gm Whole Egg
1 tsp Yeast
1/2 tsp Salt
26gm Sugar
213gm Milk
67gm Butter

80gm raisins

Method:
1. Soak raisins in rum or hot water for at least 30 minutes before use. Squeeze the raisins dry before putting into the mixer.
2. In a large mixing bowl, add in everything from (A) except for the butter. Reserve 30gm of the milk to be added in later.
3. Mix under low speed till a dough is form. Add in milk slowly. Wait till all the liquid is absorb before adding in more milk.
4. Add in butter and knead till the dough is smooth, shiny and elastic. When pull apart, dough should form a very thin, almost transparent layer.
5. Add in raisins and knead under low speed till raisins are well mix. 
6. Leave dough to rise for 60 minutes at a warm place covered with a wet cloth till double its size.
7. Take out the dough from the bowl and put in on a floured working surface. Punch the dough to get rid of the air trapped inside.
8. Divide dough into 4 equal parts. Roll each part into a smooth round ball. Leave to rest for 10 minutes.
9. Shape the dough like a swiss roll and leave to rest for another 10 minutes.
10. Repeat by shaping each dough like a swiss roll and put it in the bread pan.
11. Cover the bread pan and let the dough to proof in the oven for about 1 hour.
12. Bake in a preheated oven at 210°c for 40 minutes.
13. Unmould immediately when done and let cool completely before slicing.

Sunday 7 August 2011

Sugar Doughnuts

My maid has been pestering me to make some doughnuts every since she saw my KA mixer able to knead bread dough. I told her if I were to make on normal days, me and her would have to finish 20 biji of doughnuts in a day. Promised her I would make some on Sunday as on Sunday, there would be a huge crowd of children around.

This is a recipe I bookmarked long ago before I started baking breads. To save time, I knead the (A) part the night before, let rise for an hour and leave it in the fridge for about 18 hours. I don't know whether this affect my dough or not but it shouldn't as there are many recipes out there calling for overnight-dough-rising starter.

I am not careful enough when breaking my eggs and my hand slip so I only put in about 30gm of eggs. The rest of the egg I substituted with water.

The dough is also quite hard to manage because its very soft and I end up using quite a lot of flour to work the dough.

Nevertheless, this is a good doughnut recipe and its a keeper!!!


Sugar Doughnuts
(Adapted from: Nasi Lemak Lover)

Ingredients:
(A)
412gm High Protein Flour
247ml Water
10gm Instant dry yeast

B)
103gm High Protein Flour
41gm Whole Egg
62gm Sugar
10gm Salt
15gm Milk powder
62gm Butter
26gm Water

Method:
1. Knead (A) into a smooth dough and cover with cling film and let rise for about 1 hour till double its size.
2. Pour all ingredients (B) into the mixing bowl and add in the rise dough above and mix well.
3. Add in water little by little for the flour to absorb the water fully.
4. Add in butter and knead till elastic.
5. Divide dough into 50gm round balls each and set aside for about 15 minutes covered with a wet cloth.
6. Shape dough into doughnuts and then fry in hot oil till golden brown.
7. Coat with sugar immediately.

Wednesday 27 July 2011

My First Bread - Egg & Butter Buns 鸡蛋奶油卷

Of course, the first thing I am going to mix with my KA mixer is bread dough. I don't know why but when I went to the baking supplies shop the other day before I bought the mixer, I grabbed a packet of bread flour, yeast and a loaf pan with over. I also bought Carol's book when I saw it in Kinokuniya 2 weeks ago.

So, with all the necessary ingredients on hand, I watched in awe the way the mixer knead my dough.


Since this is my first time baking bread, I stayed beside the oven for the whole baking process and watch my bread rise, releasing the aroma that I have waited for so long in my kitchen... 


Egg & Butter Buns 鸡蛋奶油卷
(Adapted from: 烘焙新手必備的第二本書 by Carol 自在生活 )
 ** Make 8 pcs

Ingredients:
270gm High Protein Flour / Bread Flour
30gm Low Protein Flour / Cake Flour
1/2 tsp Dried Instant Yeast
150gm Whole Eggs
30gm Castor Sugar
1/8 tsp Salt
50ml Milk
30gm Butter

Method:
1. Cubed butter into tiny pieces and leave in fridge.
2. Put all the above ingredients except butter into a mixing bowl. (Reserve 30ml of the milk to be added in later.)
3. Using an electric mixer, mix everything together till a dough is form. Slowly pour in the remaining milk making sure that all the liquid are absorb before the next pour.
4. Add in butter and knead till the dough is smooth, shiny and elastic. When pull apart, dough should form a very thin, almost transparent layer.
5.  Leave dough to ferment for 60 minutes at a warm place covered with a wet cloth.
6. Divide dough into 8 equal pieces (~70gm each) and shape into round balls. Leave to rest for 15 minutes.
7. Shape dough and arrange it onto a baking tray lined with parchment paper.
8. Spray some water onto the shaped dough surface and leave to proof for another 60 minutes in the oven.
9. Take the dough out from the oven and brush lightly with egg and sprinkle some sesame seeds on top.
10. Bake in a preheated oven for 15-20 minutes at 170c.
11. Leave bread to cool on a wire rack before serving.

Sunday 24 July 2011

The Ultimate Baker's Dream - KA Mixer

After I started baking cakes, I have been eye-ing the ultimate mixer for bakers. The Kitchenaid Mixer.

All these while, I have been using a RM 89 stand mixer from Pensonic. It gave me good results in beating eggs and the normal cake batter. But of course, I really wanna try and lay my hands on bread dough.

Been contemplating to get a breadmaker instead but seriously, a breadmaker only bakes bread.Where else, a Kitchenaid, does what a Kitchenaid do! :)

So, I quietly surveyed the prices around and starting googling for more info and also asking some friends who are in the professional line of patisserie. One of my friend told me to get a Kitchenaid rather than Kenwood because Kenwood has a belt to run its motor while a Kitchenaid has direct heating. Now, don't ask me to elaborate as I really don't know what does it mean.

I found out that purchasing a Kitchenaid in Singapore will be much more cheaper and it cost about $779 for an Artisan at major departmental stores. In KL, the best price I found was RM 2400 nett. Since I have relatives in Singapore and I am going for a 2d1n trip during the Raya holidays, might as well I hand carry back. BUT... My cheapo mixer died on me. Sigh... It just doesn't go beyond the first speed which is so irritating when I need to beat egg whites.

Hubby being the ultimate hubby, knows exactly what I want. He told me not to wait anymore and just buy the Kitchenaid from KL. He said he lazy to carry it back from Singapore. LOL..

So we went surveying and found this. The Kitchenaid Artisan in Candy Red Apple.


Its a bit more expensive than the usual Artisan because it comes with an extra 2.8L stainless steel bowl, a pouring shield, a burnished metal dough hook and cake beater and the usual wire whip. We got a fairly good price after some negotiation.

I also got the Mixer Cover which cost me RM 119 to protect it from dust.


One more picture of my KA mixer...

Saturday 23 July 2011

Hokkaido Chiffon Cupcakes

I am assigned to prepare the desserts for next Saturday joint birthday party. Cracked my head hard these few days to think what am I going to bake. I need something that can impress people and suit everybody's taste bud from young to old.

Cooling on the rack...
After going through so many recipe blogs, I decided to bake this next Saturday as the birthday cake. I would also bake a Japanese Cotton Cheesecake and a Pandan Chiffon Cake. Then, I would order some of the best Jelly Mooncakes that I have tried and some Teochew Yam Paste Mooncake.

If you want the contact, leave a comment and I will let you know where to get them.

Since I am going to bake this for the first time, today is my first trial. Oh Boy.. The cake taste really soft!!!

I inserted a fine chopstick in the middle to make pumping easier.
When I first pump the custard cream into the cake, I tried and its sweet. After 1 hour in the fridge, its still sweet. But when I try again after 6 hours, the cream taste bland. What went wrong?

Also acts as Hubby's birthday cake...


Hokkaido Chiffon Cupcakes
(Adapted from: 周老师的美食教室
**make about 8 square cupcakes

Ingredients:
3 Egg Yolks
1/8 tsp Salt
20gm Corn Oil
20gm Milk
50gm Self Raising Flour

3 Egg Whites
50gm Castor Sugar

Method:
1. Using a hand whisk, whisk egg yolks with salt till salt dissolved.
2. Add in oil and milk.
3. Sieve in flour and mix till a smooth consistency.
4. In a clean large bowl, whisk egg whites till foamy then add in castor sugar in 3 parts.
5. Whisked till soft peaks under lowest speed.
6. Fold the whites into the yolks mixture gently in 3 parts.
7. Scoop the batter into square cups. Each cup about 35gm of cake batter.
8. Bake in a preheated oven at 160c for 15 minutes.
9. When cupcakes is done, remove from oven and let cool completely on a cooling rack.

For the Fillings:

60gm Fresh Whipped Cream
12gm Custard Powder
40gm Milk

1. Combine custard powder and milk then add into the whipped cream.
2. Mix well and pump into the centre of the Chiffon Cupcakes.
3. Chill the cupcakes in the fridge for 2-3 hours before serving to get the best texture.